Category:Background icons
Jump to navigation
Jump to search
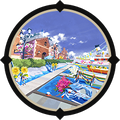
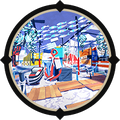
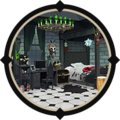
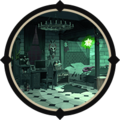
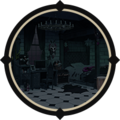
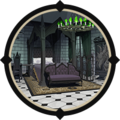
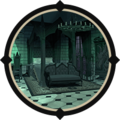
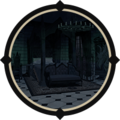
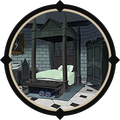
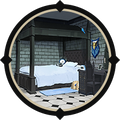
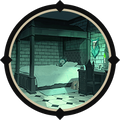
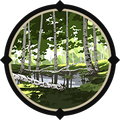
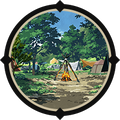
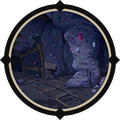
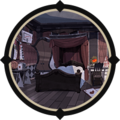
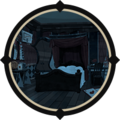
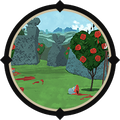
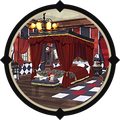
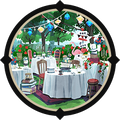
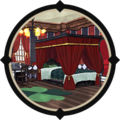
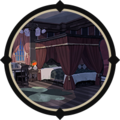
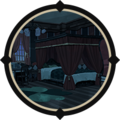
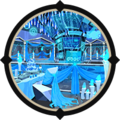
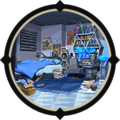
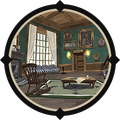
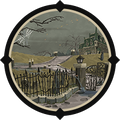
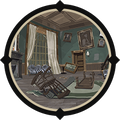
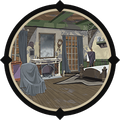
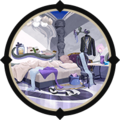
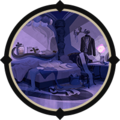
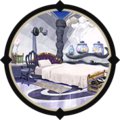
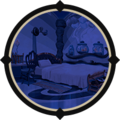
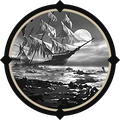
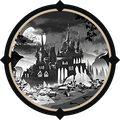
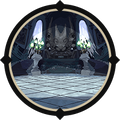
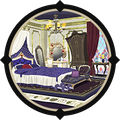
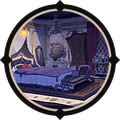
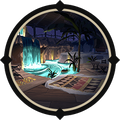
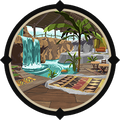
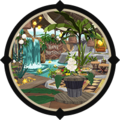
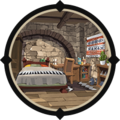
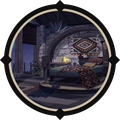
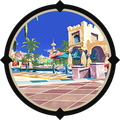
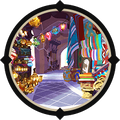
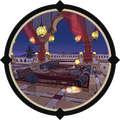
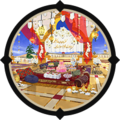
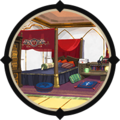
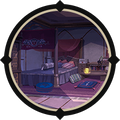
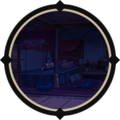
Icons of backgrounds as shown in shops.
Media in category "Background icons"
The following 160 files are in this category, out of 160 total.
 Alchemy Workshop - Chemical Storage (Halloween) Icon.png 200 × 200; 18 KB
 Beach (Evening) Icon.png 200 × 200; 12 KB
 Botanical Garden (Halloween) Icon.png 200 × 200; 20 KB
 Campus Basketball Court (Noon) Icon.png 200 × 200; 17 KB
 Campus Cafeteria (Noon) (Wedding Ceremony).png 200 × 200; 20 KB
 Campus Cafeteria (Noon) Icon.png 200 × 200; 20 KB
 Campus Classroom (Noon) Icon.png 200 × 200; 16 KB
 Campus Coliseum (Noon) Icon.png 200 × 200; 19 KB
 Campus Exterior Hallway (Noon) Icon.png 200 × 200; 19 KB
 Campus Kitchen Icon.png 200 × 200; 19 KB
 Campus Laboratory (Noon) Icon.png 200 × 200; 17 KB
 Campus Main Street (Noon) Icon.png 200 × 200; 19 KB
 Campus School Infirmary (Noon) Icon.png 200 × 200; 19 KB
 Campus Sports Field (Noon) Icon.png 200 × 200; 17 KB
 Campus VDC Stage (Noon) Icon.png 200 × 200; 18 KB
 City of Flowers (Downtown) (Day) Icon.png 200 × 200; 19 KB
 Closed Main Gate (Halloween) Icon.png 200 × 200; 62 KB
 Coliseum Stage (Halloween) Icon.png 200 × 200; 19 KB
 Coral Sea Icon.png 200 × 200; 17 KB
 Crane Port (Pier) (Day) Icon.png 200 × 200; 18 KB
 Crane Port (Whistle Park) (Day) Icon.png 200 × 200; 19 KB
 Diasomnia Dorm Lounge Birthday Icon.png 200 × 200; 19 KB
 Diasomnia Lilia's Room (Day) Icon.png 200 × 200; 19 KB
 Diasomnia Lilia's Room (Night 2) Icon.png 200 × 200; 18 KB
 Diasomnia Lilia's Room (Night) Icon.png 200 × 200; 19 KB
 Diasomnia Malleus's Room (Day) Icon.png 200 × 200; 19 KB
 Diasomnia Malleus's Room (Night 2) Icon.png 200 × 200; 20 KB
 Diasomnia Malleus's Room (Night) Icon.png 200 × 200; 20 KB
 Diasomnia Sebek's Room (Day) Icon.png 200 × 200; 18 KB
 Diasomnia Sebek's Room (Night 2) Icon.png 200 × 200; 19 KB
 Diasomnia Silver's Room (Day) Icon.png 200 × 200; 18 KB
 Diasomnia Silver's Room (Night 2) Icon.png 200 × 200; 17 KB
 Dwarf Mine Bottomless Swamp (Noon) Icon.png 200 × 200; 20 KB
 Dwarf Mine Campsite (Night) (Tent) Icon.png 200 × 200; 20 KB
 Dwarf Mine Campsite (Noon) (Tent) Icon.png 200 × 200; 20 KB
 Dwarf Mine Interior Mine (Light) Icon.png 200 × 200; 19 KB
 East Oasis (Thirst) Icon.png 200 × 200; 16 KB
 Golden Straw Deck (Day) Icon.png 200 × 200; 18 KB
 Harveston (Apple Square)(Night) Icon.png 200 × 200; 19 KB
 Harveston (Assembly Room)(Day) Icon.png 200 × 200; 19 KB
 Harveston (Kelkkarotu Venue)(Dawn) Icon.png 200 × 200; 17 KB
 Harveston (Raceway)(Day) Icon.png 200 × 200; 16 KB
 Heartslabyul Ace's Room (Day) Icon.png 200 × 200; 17 KB
 Heartslabyul Ace's Room (Night 2) Icon.png 200 × 200; 18 KB
 Heartslabyul Ace's Room (Night) Icon.png 200 × 200; 19 KB
 Heartslabyul Cater's Room (Day) Icon.png 200 × 200; 18 KB
 Heartslabyul Cater's Room (Night 2) Icon.png 200 × 200; 44 KB
 Heartslabyul Cater's Room (Night) Icon.png 200 × 200; 19 KB
 Heartslabyul Deuce's Room (Day) Icon.png 200 × 200; 17 KB
 Heartslabyul Deuce's Room (Night 2) Icon.png 200 × 200; 18 KB
 Heartslabyul Dorm Lounge (Night) Icon.png 200 × 200; 20 KB
 Heartslabyul Dorm Lounge (Noon) Icon.png 200 × 200; 20 KB
 Heartslabyul Dorm Lounge Birthday Icon.png 200 × 200; 20 KB
 Heartslabyul Exterior (Noon) Icon.png 200 × 200; 20 KB
 Heartslabyul Maze & Rose Garden (Noon) Icon.png 200 × 200; 17 KB
 Heartslabyul Riddle's Room (Day) Icon.png 200 × 200; 19 KB
 Heartslabyul Riddle's Room (Night 2) Icon.png 200 × 200; 18 KB
 Heartslabyul Tea Garden Icon.png 200 × 200; 19 KB
 Heartslabyul Trey's Room (Day) Icon.png 200 × 200; 17 KB
 Heartslabyul Trey's Room (Night 2) Icon.png 200 × 200; 51 KB
 Heartslabyul Trey's Room (Night) Icon.png 200 × 200; 47 KB
 Ignihyde Dorm Lounge Birthday Icon.png 200 × 200; 20 KB
 Ignihyde Idia's Room (Day) Icon.png 200 × 200; 17 KB
 Ignihyde Idia's Room (Night 2) Icon.png 200 × 200; 18 KB
 Ignihyde Idia's Room (Night) Icon.png 200 × 200; 18 KB
 Ignihyde Ortho's Room (Night 2) Icon.png 200 × 200; 16 KB
 Land of Dawning National Museum of Art Icon.png 200 × 200; 18 KB
 Library Entrance (Halloween) Icon.png 200 × 200; 19 KB
 Main Dorm - Exterior (Ramshackle) (Halloween) Icon.png 200 × 200; 19 KB
 Main Dorm - Lounge (New Year) Icon.png 200 × 200; 19 KB
 Main Dorm - Lounge (Ramshackle) (1st Anniversary) Icon.png 200 × 200; 19 KB
 Main Dorm - Lounge (Ramshackle) (Halloween) Icon.png 200 × 200; 19 KB
 Main Dorm - Lounge (Renovated) Icon.png 200 × 200; 18 KB
 Main Dorm Exterior (Ramshackle) (Noon) Icon.png 200 × 200; 20 KB
 Main Dorm Lounge (Ramshackle) (Night) Icon.png 200 × 200; 19 KB
 Main Dorm Lounge (Ramshackle) (Noon) Icon.png 200 × 200; 19 KB
 Main Dorm My Room (Noon) Icon.png 200 × 200; 17 KB
 Main Dorm My Room (Ramshackle) (Night) Icon.png 200 × 200; 19 KB
 Main Dorm My Room (Ramshackle) (Noon) Icon.png 200 × 200; 19 KB
 Main Gate (Halloween) Icon.png 200 × 200; 19 KB
 Main Gate Dawn (Halloween) Icon.png 200 × 200; 19 KB
 Main Street (Halloween) Icon.png 200 × 200; 18 KB
 Mirror Chamber (Halloween) Icon.png 200 × 200; 19 KB
 Mister S Mystery Shop - Interior (New Year) Icon.png 200 × 200; 20 KB
 Mister S's Mystery Shop - Exterior (Halloween) Icon.png 200 × 200; 18 KB
 Noble Bell College (Bell Tower Upstairs) (Day) Icon.png 200 × 200; 17 KB
 Noble Bell College (Front) (Day) Icon.png 200 × 200; 19 KB
 Octavinelle Azul's Room (Day) Icon.png 200 × 200; 18 KB
 Octavinelle Azul's Room (Night 2) Icon.png 200 × 200; 19 KB
 Octavinelle Azul's Room (Night) Icon.png 200 × 200; 19 KB
 Octavinelle Dorm Exterior (Noon) Icon.png 200 × 200; 20 KB
 Octavinelle Dorm Lounge (Night) Icon.png 200 × 200; 18 KB
 Octavinelle Dorm Lounge (Noon) Icon.png 200 × 200; 18 KB
 Octavinelle Dorm Lounge Birthday Icon.png 200 × 200; 19 KB
 Octavinelle Dorm Mostro Lounge Icon.png 200 × 200; 15 KB
 Octavinelle Dorm VIP Room Icon.png 200 × 200; 17 KB
 Octavinelle Floyd's Room (Day) Icon.png 200 × 200; 18 KB
 Octavinelle Floyd's Room (Night 2) Icon.png 200 × 200; 18 KB
 Octavinelle Floyd's Room (Night) Icon.png 200 × 200; 19 KB
 Octavinelle Jade's Room (Day) Icon.png 200 × 200; 18 KB
 Octavinelle Jade's Room (Night 2) Icon.png 200 × 200; 18 KB
 Octavinelle Jade's Room (Night) Icon.png 200 × 200; 19 KB
 Other Dimension (Bizarre Staircase) Icon.png 200 × 200; 22 KB
 Other Dimension (Forbidden Laboratory) Icon.png 200 × 200; 22 KB
 Other Dimension (Forest of Screams) Icon.png 200 × 200; 22 KB
 Other Dimension (Ghost Ship Cove) Icon.png 200 × 200; 21 KB
 Other Dimension (Haunted Ghost Town) Icon.png 200 × 200; 23 KB
 Other Dimension (Hollow Graveyard) Icon.png 200 × 200; 21 KB
 Other Dimension (Sleepless Castle) Icon.png 200 × 200; 21 KB
 Other Dimension (Sparkling Chamber) (Colorless) Icon.png 200 × 200; 19 KB
 Other Dimension (Sparkling Chamber) Icon.png 200 × 200; 20 KB
 Other Dimension (Yugen Canyon) Icon.png 200 × 200; 21 KB
 Playful Land Entrance (Noon) Icon.png 200 × 200; 18 KB
 Pomefiore Dorm Ballroom (Noon) Icon.png 200 × 200; 19 KB
 Pomefiore Dorm Lounge (Night) Icon.png 200 × 200; 19 KB
 Pomefiore Dorm Lounge (Noon) Icon.png 200 × 200; 20 KB
 Pomefiore Dorm Lounge Birthday Icon.png 200 × 200; 21 KB
 Pomefiore Epel's Room (Day) Icon.png 200 × 200; 17 KB
 Pomefiore Epel's Room (Night 2) Icon.png 200 × 200; 15 KB
 Pomefiore Exterior (Noon) Icon.png 200 × 200; 20 KB
 Pomefiore Rook's Room (Day) Icon.png 200 × 200; 18 KB
 Pomefiore Rook's Room (Night 2) Icon.png 200 × 200; 16 KB
 Pomefiore Rook's Room (Night) Icon.png 200 × 200; 17 KB
 Pomefiore Vil's Room (Day).png 200 × 200; 19 KB
 Pomefiore Vil's Room (Night 2) Icon.png 200 × 200; 19 KB
 Savanaclaw Dorm Exterior (Noon) Icon.png 200 × 200; 18 KB
 Savanaclaw Dorm Lounge (Night) Icon.png 200 × 200; 17 KB
 Savanaclaw Dorm Lounge (Noon) Icon.png 200 × 200; 18 KB
 Savanaclaw Dorm Lounge Birthday Icon.png 200 × 200; 20 KB
 Savanaclaw Dorm Magift Field (Noon) Icon.png 200 × 200; 17 KB
 Savanaclaw Jack's Room (Day) Icon.png 200 × 200; 18 KB
 Savanaclaw Jack's Room (Night 2) Icon.png 200 × 200; 18 KB
 Savanaclaw Jack's Room (Night) Icon.png 200 × 200; 19 KB
 Savanaclaw Leona's Room (Day) Icon.png 200 × 200; 19 KB
 Savanaclaw Leona's Room (Night 2) Icon.png 200 × 200; 18 KB
 Savanaclaw Ruggie's Room (Day) Icon.png 200 × 200; 55 KB
 Savanaclaw Ruggie's Room (Night 2) Icon.png 200 × 200; 19 KB
 Scalding Sands Camel Bazaar (Noon).png 200 × 200; 19 KB
 Scalding Sands Fireworks Bleachers (Night).png 200 × 200; 18 KB
 Scalding Sands Silk City (Noon).png 200 × 200; 16 KB
 Scalding Sands Zahab Market (Noon).png 200 × 200; 18 KB
 Scarabia Dorm Empty Private Room (Noon) Icon.png 200 × 200; 16 KB
 Scarabia Dorm Exterior (Noon) Icon.png 200 × 200; 17 KB
 Scarabia Dorm Lounge (Night) Icon.png 200 × 200; 16 KB
 Scarabia Dorm Lounge (Noon) Icon.png 200 × 200; 17 KB
 Scarabia Dorm Lounge Birthday Icon.png 200 × 200; 19 KB
 Scarabia Dorm Treasure Vault Icon.png 200 × 200; 19 KB
 Scarabia Jamil's Room (Day) Icon.png 200 × 200; 15 KB
 Scarabia Jamil's Room (Night 2) Icon.png 200 × 200; 16 KB
 Scarabia Jamil's Room (Night) Icon.png 200 × 200; 17 KB
 Scarabia Kalim's Room (Day) Icon.png 200 × 200; 18 KB
 Scarabia Kalim's Room (Night 2) Icon.png 200 × 200; 18 KB
 School Botanical Garden (Night) (Runway IF) Icon.png 200 × 200; 21 KB
 School Botanical Garden (Runway) Icon.png 200 × 200; 20 KB
 Sunset Savanna Arena (Noon).png 200 × 200; 19 KB
 Sunset Savanna Market (Noon).png 200 × 200; 19 KB
 Sunset Savanna Sunrise City (Noon).png 200 × 200; 19 KB
 Sunset Savanna Sunset Villa (Noon).png 200 × 200; 18 KB
 Woods Behind Campus (Day) (Wishing Star) Icon.png 200 × 200; 20 KB
 Woods Behind Campus (Night) (Wishing Star) Icon.png 200 × 200; 20 KB
_(Wedding_Ceremony).png)
.png)
.png)
.png)
.png)
.png)
.png)
.png)
.png)
.png)
_Icon.png)
_Icon.png)
_Icon.png)
_Icon.png)
_Icon.png)
_Icon.png)
_Icon.png)
_Icon.png)
_Icon.png)
_Icon.png)
_Icon.png)
_Icon.png)
_Icon.png)
_(Day)_Icon.png)
_Icon.png)
_Icon.png)
_(Day)_Icon.png)
_(Day)_Icon.png)
_Icon.png)
_Icon.png)
_Icon.png)
_Icon.png)
_Icon.png)
_Icon.png)
_Icon.png)
_Icon.png)
_Icon.png)
_Icon.png)
_Icon.png)
_(Tent)_Icon.png)
_(Tent)_Icon.png)
_Icon.png)
_Icon.png)
_Icon.png)
(Night)_Icon.png)
(Day)_Icon.png)
(Dawn)_Icon.png)
(Day)_Icon.png)
_Icon.png)
_Icon.png)
_Icon.png)
_Icon.png)
_Icon.png)
_Icon.png)
_Icon.png)
_Icon.png)
_Icon.png)
_Icon.png)
_Icon.png)
_Icon.png)
_Icon.png)
_Icon.png)
_Icon.png)
_Icon.png)
_Icon.png)
_Icon.png)
_Icon.png)
_Icon.png)
_Icon.png)
_Icon.png)
_(Halloween)_Icon.png)
_Icon.png)
_(1st_Anniversary)_Icon.png)
_(Halloween)_Icon.png)
_Icon.png)
_(Noon)_Icon.png)
_(Night)_Icon.png)
_(Noon)_Icon.png)
_Icon.png)
_(Night)_Icon.png)
_(Noon)_Icon.png)
_Icon.png)
_Icon.png)
_Icon.png)
_Icon.png)
_Icon.png)
_Icon.png)
_(Day)_Icon.png)
_(Day)_Icon.png)
_Icon.png)
_Icon.png)
_Icon.png)
_Icon.png)
_Icon.png)
_Icon.png)
_Icon.png)
_Icon.png)
_Icon.png)
_Icon.png)
_Icon.png)
_Icon.png)
_Icon.png)
_Icon.png)
_Icon.png)
_Icon.png)
_Icon.png)
_Icon.png)
_Icon.png)
_(Colorless)_Icon.png)
_Icon.png)
_Icon.png)
_Icon.png)
_Icon.png)
_Icon.png)
_Icon.png)
_Icon.png)
_Icon.png)
_Icon.png)
_Icon.png)
_Icon.png)
_Icon.png)
_Icon.png)
_Icon.png)
_Icon.png)
_Icon.png)
_Icon.png)
_Icon.png)
_Icon.png)
_Icon.png)
_Icon.png)
_Icon.png)
_Icon.png)
_Icon.png)
_Icon.png)
_Icon.png)
_Icon.png)
_Icon.png)
_Icon.png)
_Icon.png)
_Icon.png)
_Icon.png)
_Icon.png)
_(Runway_IF)_Icon.png)
_Icon.png)
_(Wishing_Star)_Icon.png)
_(Wishing_Star)_Icon.png)